 Table of Contents
Settings
Settings provide a centralized location where you can view and manage various attributes of the web application.
Settings
To Add Settings
- Go to the required Web Applications > Edit > Settings.
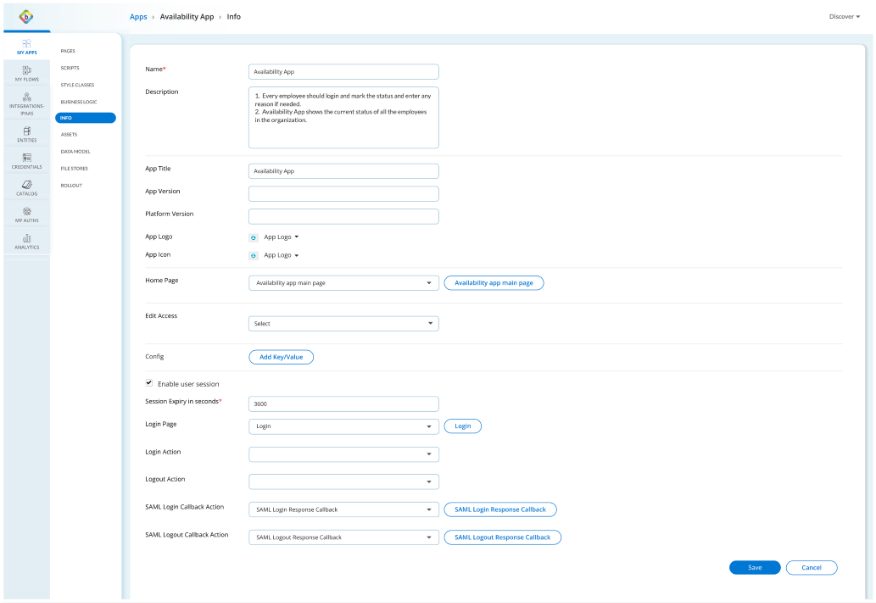
- Customize the web application by adding the necessary data and selecting the appropriate actions for the following fields under Settings:
- Name: Add the name of the web application for identification purposes.
- Description: Provide a summary of the web application's purpose and functionality.
- Title: Set the title or heading of the web application to display in the Web Applications dashboard.
- Logo: Select the graphical representation or logo associated with the web application.
- Icon: Select the icon used to represent the web application on the home screen or navigation bar.
- Home Page: Select the landing page or initial screen to be shown when you open the web application.
- Edit Access: Configure access permissions to control who can modify the web application's settings or configurations.
- Config: Add data in a key-value format to customize the web application's configuration settings. Key represents the name of the setting, and Value represents its corresponding value.
-
Enable user session: Select whether to enable user sessions, allowing users to maintain a continuous state across interactions.
The below fields are enabled only if you select to Enable the user session.
- Session Expiry in seconds: Set the duration after which an inactive user session will expire, measured in seconds.
- Login Page: Select the page where users will log in and access the web application.
- Login Action: Choose the action or behavior to be executed when a user successfully logs in to the web application.
- Logout Action: Specify the action to be taken when a user logs out of the web application.
- SAML Login Callback Action: Customize the action taken after a successful Security Assertion Markup Language (SAML) login process.
-
SAML Logout Callback Action: Select the action taken when a user initiates the logout process through SAML.
The selection of logo, page, or users are shown in Settings from the respective sections of the Backflipt platform. For example, if you want to add a new logo to the Assets, upload the logo in the Assets Tab. Then the new logo gets added into the list in Settings for your selection.
- Click Save. After the information is saved, the Settings show the updated information.